
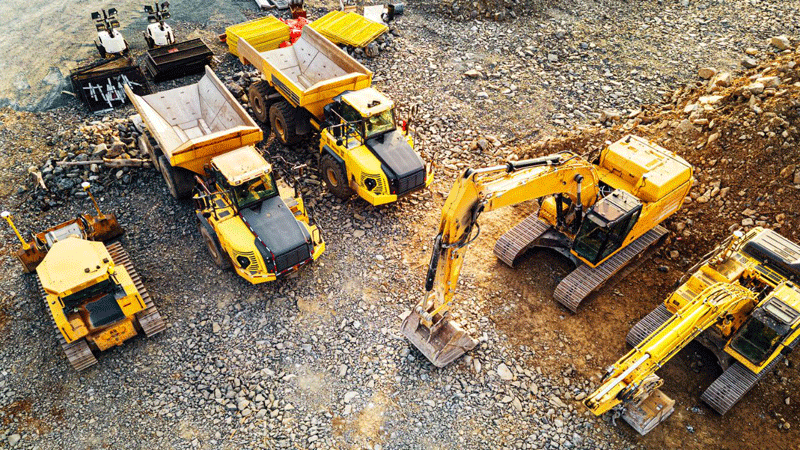
Before a client reads a word of your tender, website or capability statement, they'll see your photos. And in a split second, those photos tell them whether you’re a reputable business and whether they may want to work with you.
Construction is in many ways a visual industry. Your work is physical, impressive and often enormous, so your marketing should show it. Yet many construction companies still rely on generic stock images, blurry phone shots or a handful of photos from years ago.
Here’s how to build a photo library that actually helps you win work.
Why real photos beat stock images
Stock photos are easy because you simply pluck them off an online database, but they come at a cost. And I'm not referring to the price of purchasing them. Clients have seen an almost identical smiling person in a spotless hard hat on other websites, and they know it isn’t you. Generic images make your business look generic. What you save in time, you pay for in credibility.
Real photos of your projects, people and equipment prove you’ve done the work. They build trust, they set you apart from competitors, and they give clients and tender assessors something concrete to judge you on.
Where your photos come in handy
A good photo library pays off across almost all your marketing:
- Your website: to show clients the quality of your work before they ever meet you
- Case studies: to prove the results you describe
- Capability statements and tenders: to back up your claims with evidence
- LinkedIn: to keep your business visible between projects (phone photos are perfect here)
- Your Google Business Profile: to stand out in local search
- Award submissions: to make judges really consider your entry
- Recruitment: to show people what it’s like to work with you
What to photograph on every project
Make photography part of every project, rather than an afterthought. Aim to capture:
- Before, during and after: the site before work starts, key stages of construction and the finished result
- Your team at work: people operating equipment, collaborating on site and solving problems
- Your plant and equipment: especially specialist machinery that shows your capability
- Hero shots of finished projects: the standout images you’ll use again and again
- Aerial views: drone photography shows scale and context in a way ground shots can’t
- Your people: headshots and team photos for your website, proposals and careers page
- Community and culture: site events, charity days, apprentices and milestones
- The details: quality finishes, clever solutions and craftsmanship up close
How to take better construction site photos on your phone
You don’t need a professional for all your photos. Progress photos and everyday social posts can be taken on a phone, if you follow a few basic 'rules'.
Wipe your lens. Construction phones tend to live in pockets and on dusty dashboards. A quick wipe is the easiest way to get sharper photos. Just take care not to scratch the lens.
Shoot in good light. Early morning and late afternoon light is softer and more flattering than harsh midday sun, which creates deep shadows and washed-out colours.
Think about where the photo will be used. Shoot landscape (horizontal) for LinkedIn posts, project updates, client reports and regular YouTube videos. Shoot portrait (vertical) for Instagram and Facebook stories, reels and YouTube Shorts. If you’re not sure, take both.
Keep your lines straight, unless you intentionally want to shoot on angles. Turn on your camera’s grid lines and keep buildings and structures upright. Accidental tilts make photos look rushed. Dramatic angles, like looking up at a tall structure, can work brilliantly, as long as they’re clearly deliberate.
Tidy up first. Move bins, offcuts, rubbish and stray equipment out of the frame. A quick tidy makes a huge difference. Unless, of course, you're capturing the reality of a site mid-build.
Include people for scale. A person in the shot helps viewers understand just how big a structure, excavation or machine really is.
Take more than you need. Photos are free. Take several of each scene, so you have options later.
Construction progress photography
Progress photos show a project’s transformation from start to finish, and they’re some of the most useful images you’ll ever take. Use them in case studies, client updates, tenders and LinkedIn posts.
Choose a few vantage points at the start of the project and return to them at every stage, ideally at the same time of day so the light is consistent. A series of photos from one angle tells a powerful story.
Construction time-lapse photography
On longer projects, a time-lapse camera can capture the entire build automatically. A fixed camera takes photos at set intervals, often for months, and turns them into a short video of the project coming to life. Time-lapse videos are especially effective on your website, on LinkedIn and at project handovers, and they let clients see progress without visiting the site.
Get the safety, permissions and copyright sorted
Check every photo for safety
This one is critical. A photo that shows someone without the right PPE, or work happening without proper edge protection or barriers, can undermine your credibility instantly, especially with tender assessors. Never stage an unsafe shot, and check every image before you publish it.
Get the client’s approval
Check your contract and ask your client before photographing or publishing their project. Some clients have confidentiality requirements, and some sites (such as defence, critical infrastructure or private developments) have strict photography rules.
Get consent from people in your photos
If staff, subcontractors or members of the public are identifiable in your photos, it’s best practice to get their written consent before using the images in your marketing. A simple photo release form for staff and subcontractors makes this easy.
Check who owns the photos
If you hire a professional photographer, they will often own the copyright in the images unless your agreement says otherwise. Before the shoot, make sure your agreement gives you the right to use the photos wherever you need them: your website, tenders, social media, print and future marketing.
Fly drones legally
Drone flying in Australia is regulated by the Civil Aviation Safety Authority (CASA), and the rules for commercial use are stricter than for recreational flying. Use a licensed drone operator, and check for restrictions near airports, people and the site itself before anyone takes off.
When to hire a professional construction photographer
Phone photos are fine for progress shots and everyday social posts. But for hero shots of finished projects, team photos and headshots, a professional photographer is worth the investment. These are the images that will represent your business for years.
What to look for in a construction photographer:
- Construction experience: someone who knows how to photograph sites, structures and people at work
- Site readiness: a current General Construction Induction (White Card), their own PPE and appropriate insurance
- A portfolio you like: look for images that match the look you want for your brand
- Clear licensing terms: so you know exactly how you can use the photos
Brief them well. Give your photographer a list of shots you want or need, details of the project and what you’ll use the photos for. Tell them about any site restrictions, safety requirements or people who need to appear. The better the brief, the better the photos.
Organise your photo library
Great photos are no use if you can’t find them. A little organisation saves hours later.
- Use folders by project and date. e.g. 2026-03 Willowbank Road Upgrade.
- Name your best files clearly. willowbank-road-upgrade-bridge.jpg is far more useful than IMG_4827.jpg, and descriptive file names can help with SEO (when you load them to your website).
- Keep high-resolution originals. Printed documents like capability statements need large, sharp images.
- Resize images for your website. Large files slow your site down, which hurts both user experience and search rankings. Your web designer can help with this.
- Add alt text when you upload images to your website. It’s a short description that helps people using screen readers, and helps Google understand your images.
My own brand shoot
I’ll admit I put off my own brand shoot for years. I was very hesitant about being in front of the camera. In the end, I just did it, and I’m so glad I did. A few years later, I'm still making good use of the photos — although I'm probably due for another shoot soon.
We took the photos in a display village, surrounded by beautifully built homes, which suited a construction copywriter perfectly.
If you’d like the full behind-the-scenes story (including a strained calf muscle), I’ve shared it on my Substack.
Photos and words, working together
Great photos are only half the story. Paired with strong copy, they turn your website, case studies and capability statement into documents that win work.
I’ll be honest: when it comes to choosing and editing photos, I leave it to the design experts I work with. They have an eye for what looks good, what works with your brand and which image will stop someone scrolling.
My job is the words. Theirs is making sure the photos and design do the words justice. Together, it means your project photos don’t just sit on a page. They help tell the story of what your business can do.
So if you’re planning a new website or capability statement, start gathering your best project photos now. They’ll be some of the most valuable material you bring to the table.